Blackmagic Design's DaVinci Resolve 11 - A Review: Part 3
-

- September 4, 2014
By Jeremiah Hall (doddleNEWS)
doddleNEWS’ Jeremiah Hall is taking a look at Blackmagic Design’s DaVinci Resolve 11. For part one of the article, click here. For part two, click here.
When it comes to Resolve 11 and effects, the basics are there. Editors can change opacity; composite mode; and animate simple transformations, such as pan, tilt, zoom, anchor points and rotation angle. You can also crop clips, re-time them and scale them. But there are times you need more. Blackmagic Design has built OpenFX support into Resolve.
I looked up Resolve OpenFX plug-ins, and hey are out there, and from some big names. GenArts makes their Sapphire plugin set for Resolve. Boris makes an OFX version of Boris Continuum Complete 9. I downloaded a trial copy of GenArts Sapphire plugins for Resolve and installed it.
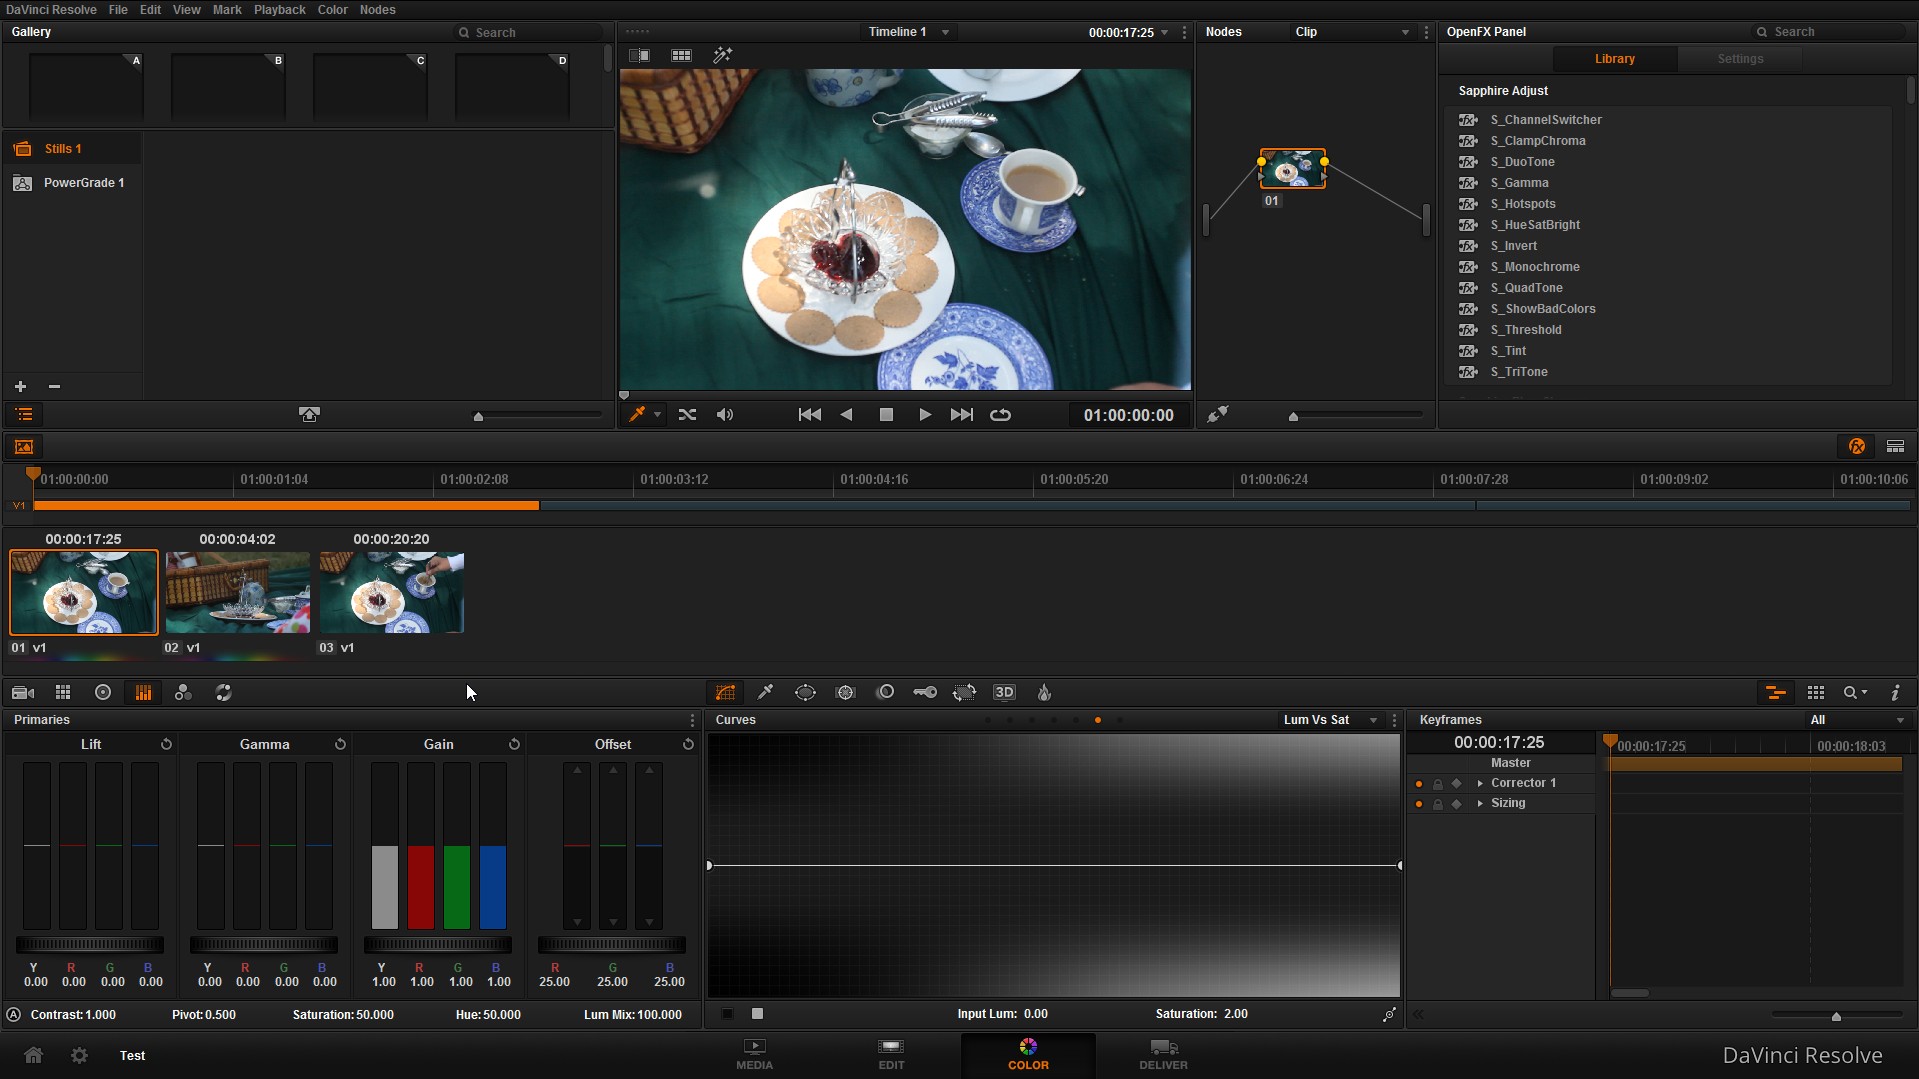
Initially, after I had installed Sapphire, I opened Resolve 11. Under the Edit pane, the OpenFX section of the toolbox was still blank. I did get a dialog box telling me to go to the Color pane to activate the effects. I moved there, and this is what I found:

Resolve 11
All the Sapphire effects were there. I moved an effect to the highlighted clip, and this is what it looked like:

After the effect.
An interesting point when it comes to the panes: when you make a change in one, it shows up in another. For example, I added an effect to a clip in the color pane. Going back to the edit pane, there it was -- in the output monitor. The timeline thumbnail was unaltered. This goes for everything. If you decide you don’t like the color of a shot, you can correct it first. The color-corrected shot will appear in the output monitor of the Edit pane when your cursor is over the clip in the timeline. This means you can move seemless ly between the two panes, letting you be the judge of when it is time to color correct and when it is time to cut.

The Edit pane after the effect is applied. Notice the effect is present in the output monitor.
After working with that effect in the Color pane, I moved back to the Edit pane. I discovered that under OpenFX in the toolbox, I had the complete list of GenArts Sapphire plug-ins at my disposal. From this, I also downloaded Neat Video’s Reduce Noise plugin. It installed just fine. I think as time goes on, you’ll find more effects makers porting their wares for OpenFX. If you want, you can still use outside software and import the result in, such as Boris FX 10, Adobe After Effects, or HitFilm 2 Ultimate.
I use Boris FX’s Boris Continuum Complete 9 a lot in my day-to-day work. If you decide to work with BCC 9 in Resolve 11, you need to read what Boris FX has this to say about it.
From Boris FX’s website: "As of the initial release of Resolve 11 it is not currently possible for an OFX plugin on one layer to access image data from a second independent layer. However some BCC plugins by their very nature require access to multiple simultaneous clips. For example BCC Light Wrap is used to generate higher quality composites, particularly with green/blue screen shots, by blending the pixels of the foreground and background to more accurately simulate the way light from a background interacts with the edges of a foreground object. Some BCC filters which fundamentally require access to multiple layers do not appear in Resolve at this time.
“As of the initial release of Resolve 11 it is not currently possible for an OFX plugin to access the source layer at points in time that are more than roughly 5 frames from the current frame. Many BCC plugins access neighboring frames and may use restricted frame ranges when running in Resolve. Other BCC plugins such as Optical Stabilizer or Optical Flow fundamentally require access to frames at very widely spaced points in time and thus are not currently supported in Resolve. For similar reasons the familiar BCC Motion Tracker cannot be used for new motion tracking analysis runs in Resolve, however, it is still possible to import tracker data calculated in other environments such as Mocha or BCC tracker exports from other hosts."
For me, this isn’t a dealbreaker. Why? My workflow may not be your workflow. Even when I’m working with Premiere Pro, I tend to do all of my effects in After Effects – rarely do I use my NLE for effects work. Once I’m happy with the effect, I render and export that particular effects sequence back in whichever NLE the client wants me to use. With Resolve 11, that may change, primarily because of the Color pane.
The Color pane is powerful. Very powerful. DaVinci Resolve has a well-earned reputation for being high-end professional color-grading software. It is, and it does phenomenal work. Proper color grading has a steep learning curve. Not the software, because Resolve 11 is fairly straight-forward when it comes to the UI. Learning to do color grading well is difficult, takes time and patience, and is its own art. You didn’t learn to edit in a day, and you won’t learn to color correct in a day.
Since I wanted to keep this more focused on Resolve 11 for the editor and not the colorist, I’m going to gloss over the Color pane. Highlights here include: working with the primaries, including Life, Gamma, Gain and Offset; an RGB mixer featuring independent mixing of blue output, green output and red output; color wheels for lift, gamma, gain and offset; Luminance Vs Saturation -- I could spend pages gong on about what the Color pane can do, so I’m just going to stop here. My suggestion is to read the manual, and then re-read it. It is worth it, especially if you are used to simple three-color correcting built-in to most NLEs. Especially read Chapter 12, Advanced Color Features. This describes several methods for using the Color pane to do chromakeying. The web is filled with interesting tutorials Resolve and color.
I’ve seen discussions about whether you need a control surface to work with Resolve 11′s Color pane. I found that when working with the Color Wheels in the Color pane, I could get away with using my Wacom Intuos Pro, with the touchpad function enabled. I know it isn’t the same as a true trackball-based control surface but it felt more natural than using a mouse or a pen. It is also significantly cheaper than buying a control surface.
Something else to think about when it comes to color-grading, effects, and -- for that matter -- editing, are your monitors. Calibrate your monitors. Making sure your monitors show the correct colors, highlights and blacks can make or break a project. You can make it look like a million bucks on your monitors, but if it doesn’t look like that on any other pro monitor out there, then you’ve wasted a lot of time. If you don’t have the hardware to calibrate, hire someone. If there’s no one around who can calibrate your monitors, invest in the hardware -- low-end calibrating hardware and software starts at about $250.00, the X-Rite i1 Pro. There is even a calibration solution directly for Resolve: Calman for DaVinci Resolve. It starts about $400.00.
Next time, we’ll look at exporting your project as well as my final thoughts. Until then, happy cutting.
The post Blackmagic Design’s DaVinci Resolve 11 – A Review: Part 3 appeared first on Doddle.