Strong Armatures For Dynamic Maquettes
-

- January 1, 2012
- Camille Waller

An armature is, essentially, the skeleton of a maquette (or small-scale model). Just as your own skeleton must be strong to support your body, a strong armature is the key to a stable and dynamic maquette.
While building maquettes with external support is common and acceptable, a well-designed maquette with a strong armature can be freestanding, which has aesthetic appeal and gives you more freedom to work across the entire maquette.
Create a Turnaround Sheet
Before beginning, you should have a well-developed turnaround sheet (drawn from several different angles) for your character. Ideally, your character will be in a neutral position, drawn the same size you desire your maquette to be. This will allow you to compare measurements easily (as seen in Photo 1).
Gather Your Tools
The tools you will need include:
|
|
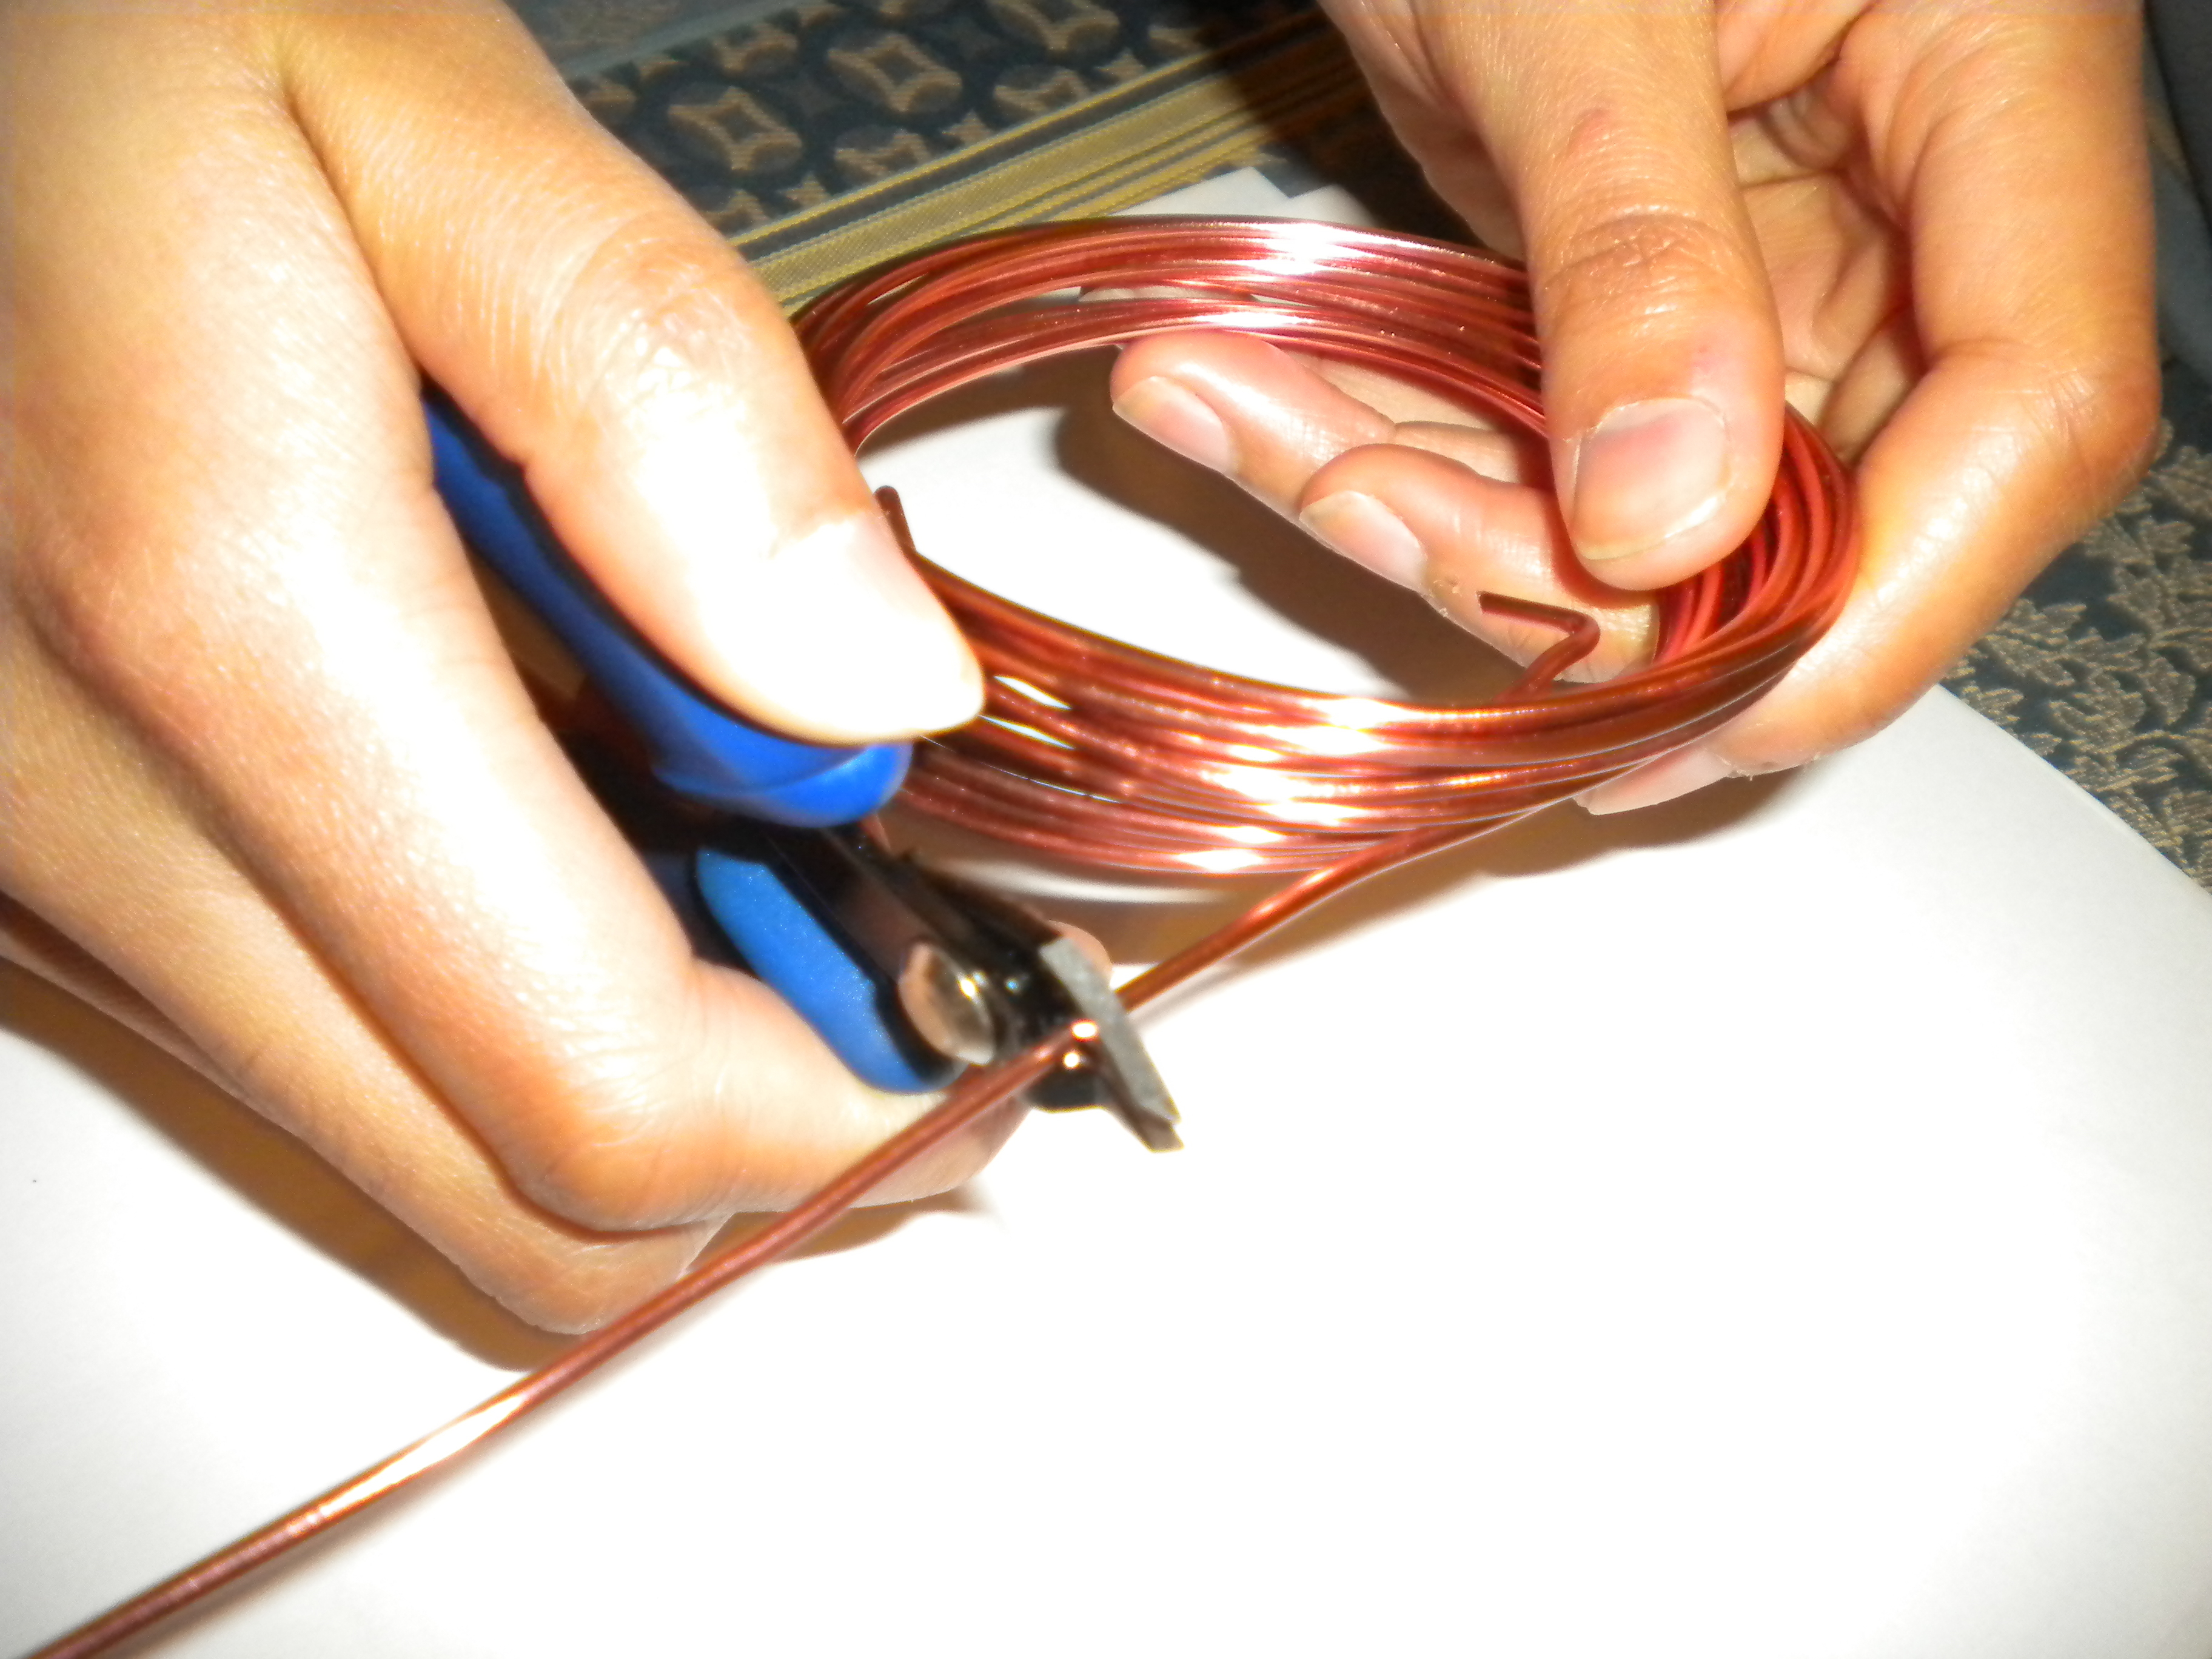
Create Stronger Armature Wire
Depending on the nature of the maquette you plan to build, you might want to strengthen your armature wire. To do this:
* Fold a length of wire in half.
* Then, secure the folded ends into the head of a power drill.
* Turn on the drill and let it twist the wire for you.
Treating the armature wire this way will help make it sturdier and more stable without compromising its flexibility. Keep in mind, though, that this technique may add too much bulk to a very small maquette. Feel free to twist some and leave some as-is so that you can use either/or in your armature.
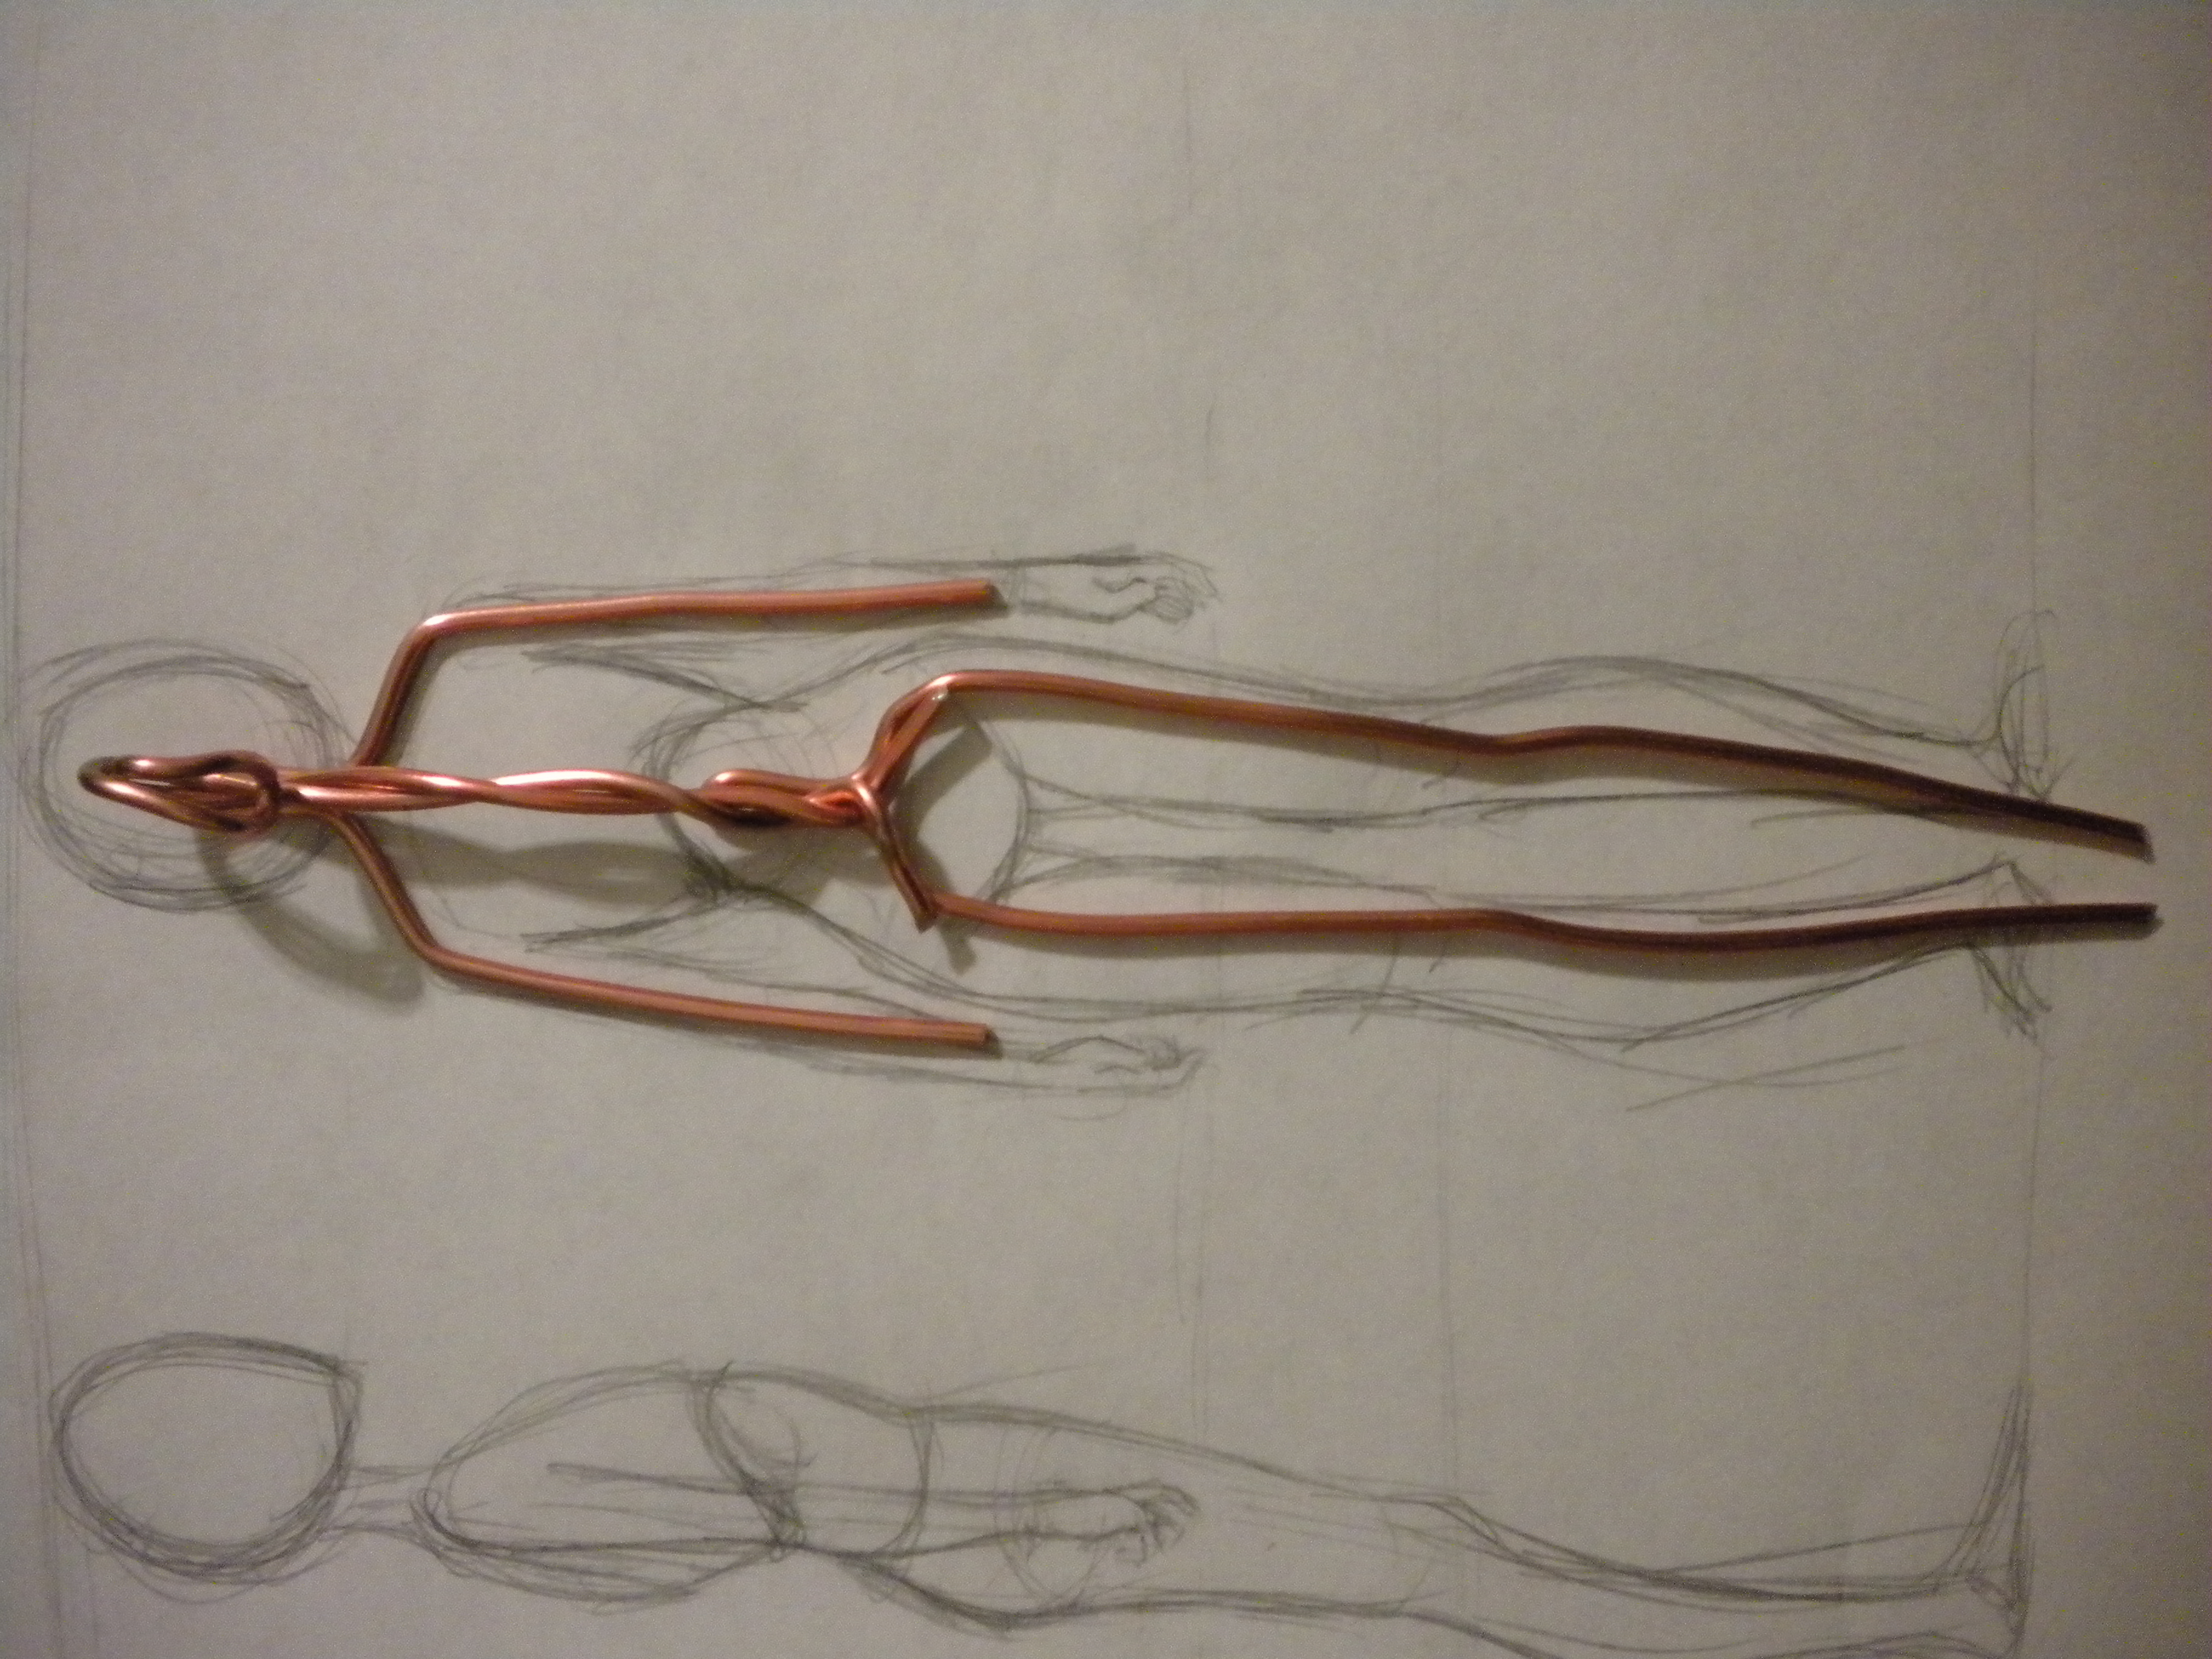
Begin Building
When you are ready to begin building, choose a length of wire and lay it on top of your drawing. Then, follow the steps below.
* Curve the end of the wire that will act as the head.
* Extend the wire down; the rest of this length will act as the spine. (The ends of the wire can be separated slightly to accommodate the wire for the legs.)
* Create the limbs next. For a biped, stretch a length of wire from one hand to the other, following the path created by the arms and shoulders.
* Do the same for the legs, leading the wire from one foot to the next.
* Cut a length of galvanized wire and attach the arms and legs to the base of the armature.
* Use pliers to create bends where the wires meet. This will help prevent the joints from moving around too much.
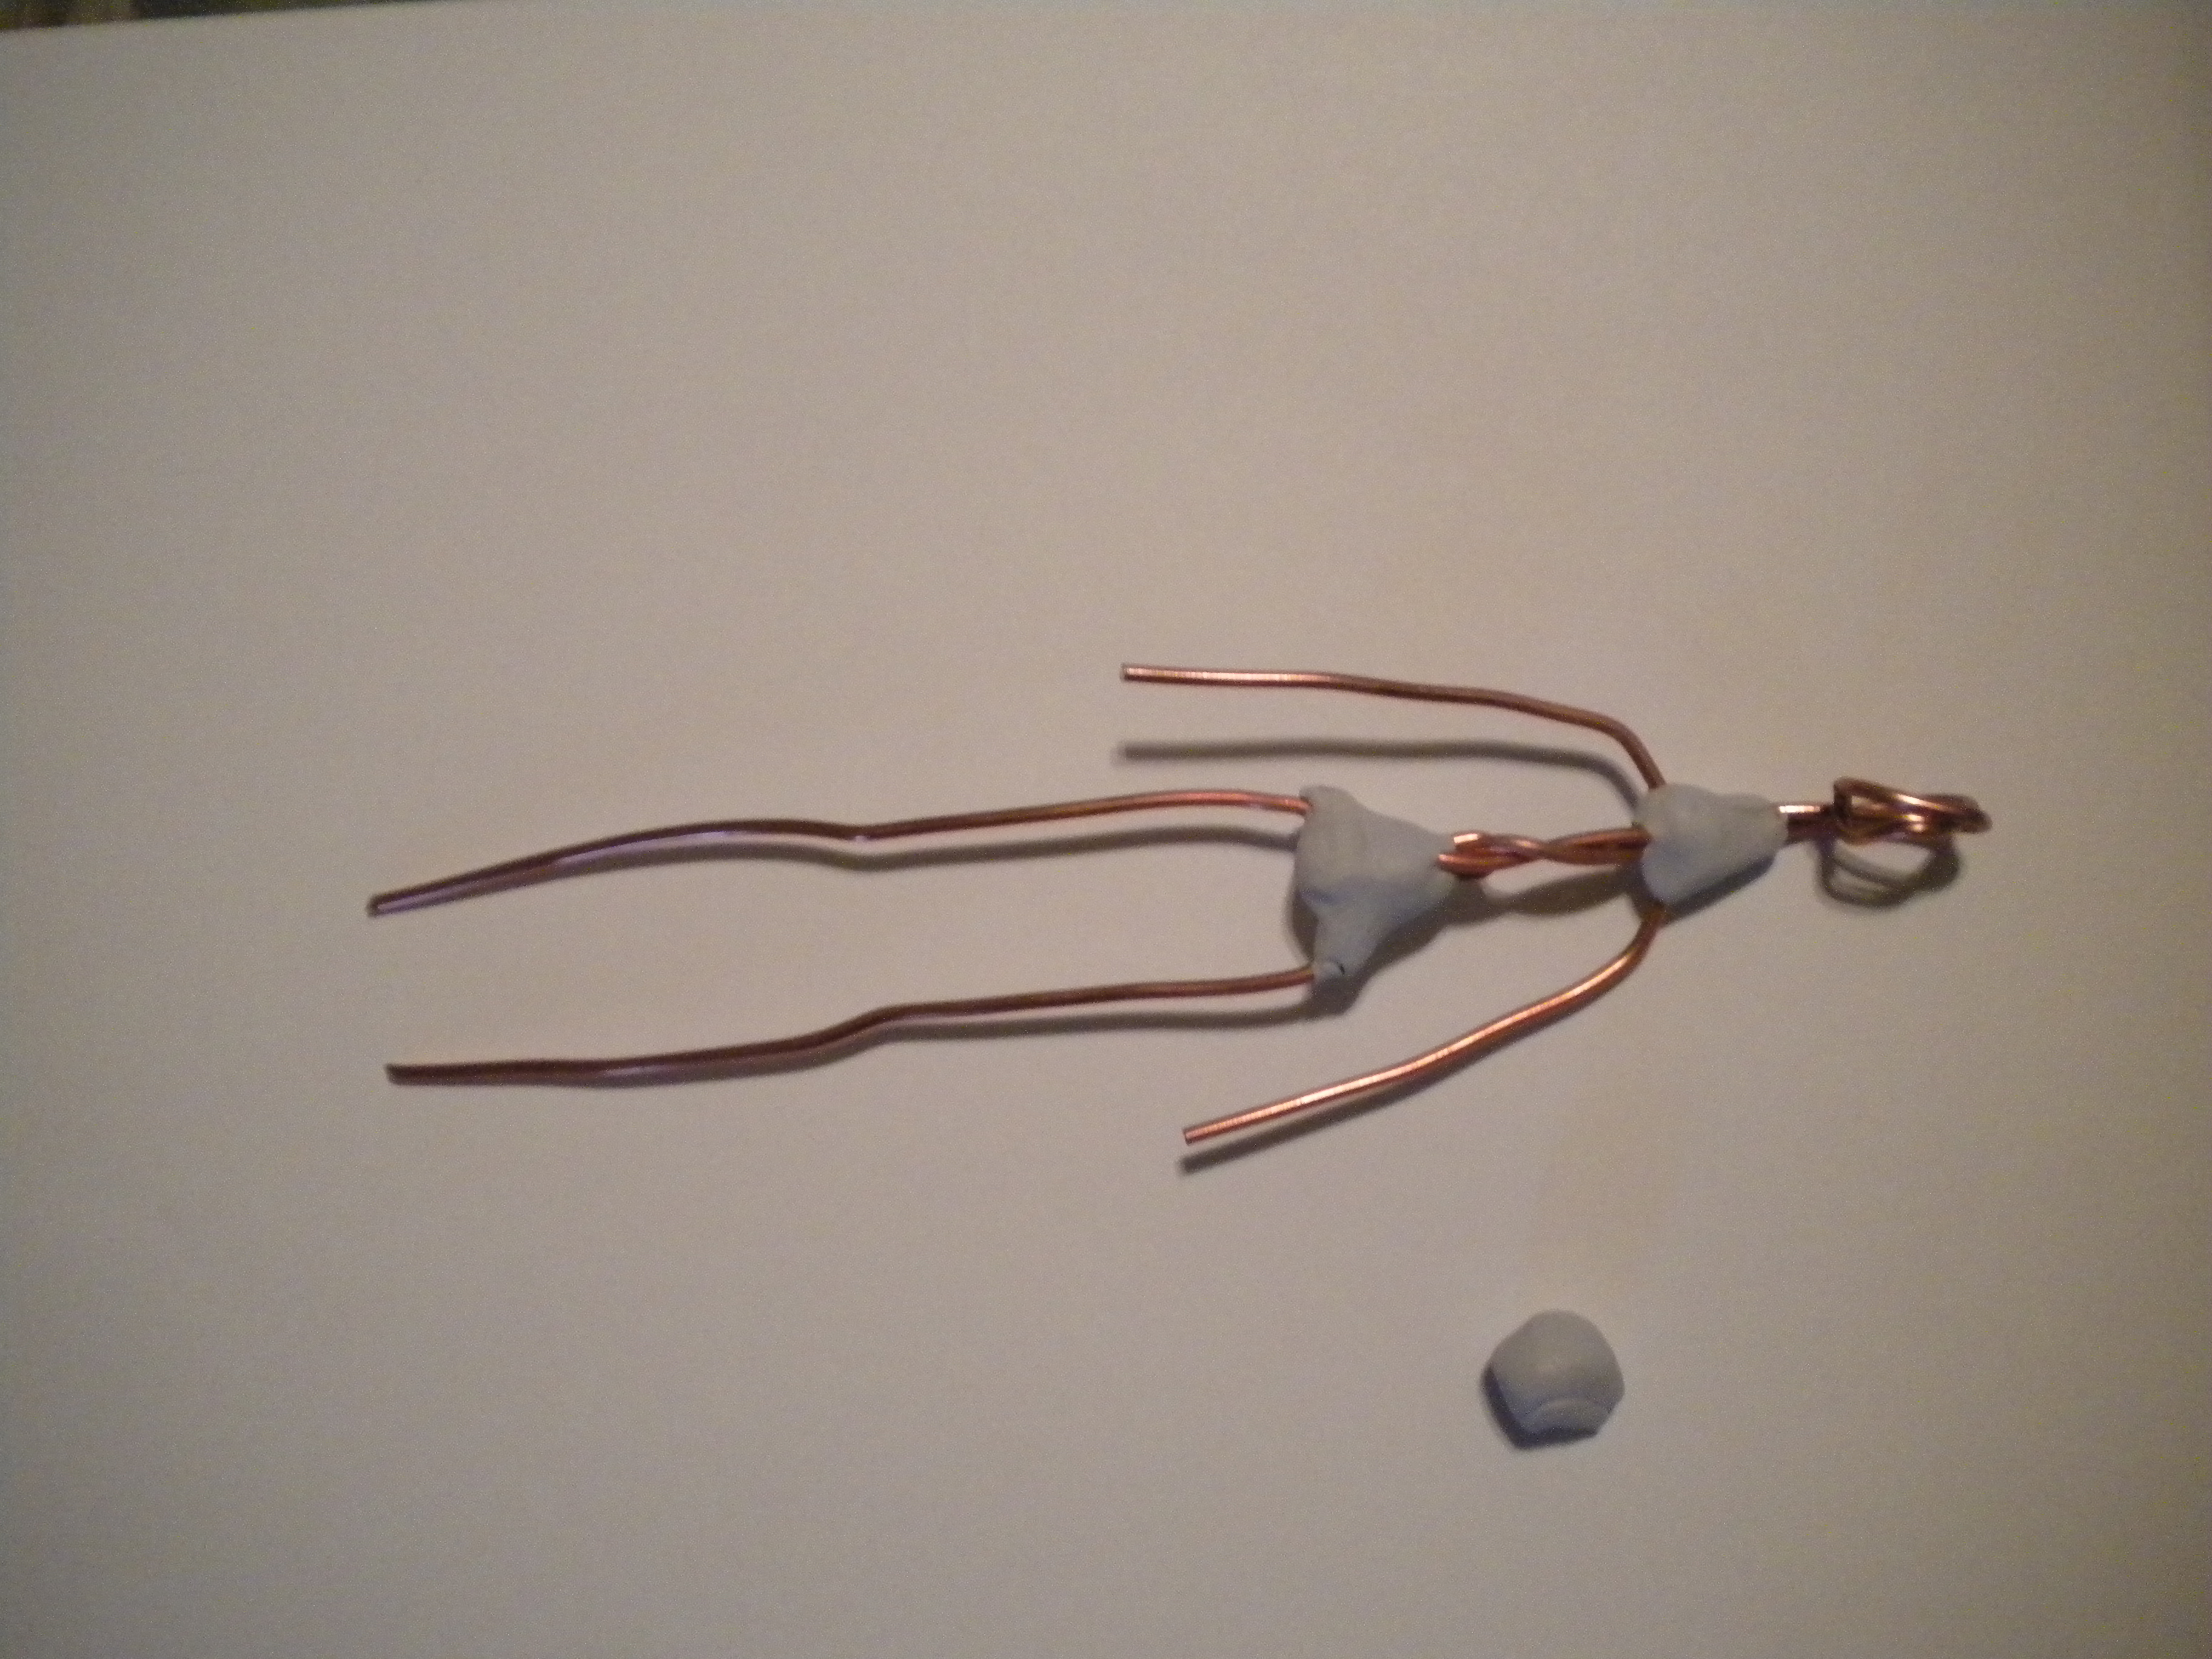
* Create small nicks in the wire or wrap single strands of wire in galvanized steel (as seen in Photo 3) if you want to help give your clay something to grab onto—especially if you won't be bulking the armature up with foil or other materials before adding clay.
* At this point, use calipers to do a final proportion check on the armature.
* If everything is secure and accurate, put on your gloves and thoroughly knead a few pieces of epoxy.
* Press the mixed epoxy in around the joints, reinforcing the spots where the wires meet (as seen in Photo 4). (Make sure you are in a well-ventilated area while working with the epoxy.)
Pose Your Maquette
Once the epoxy has dried, you are ready to pose your maquette. If you haven't created bends for the feet, do so at this point, and stand the armature on the wood base. Then, refer to your reference drawing while positioning your armature.
A well-balanced armature should be able to stand on its own. If it does not, adding weight to it will help. If you decide you want to secure your armature to a stand, create small “feet” out of epoxy to help keep your armature stable in the early stages. You can also create primitive hands out of epoxy, using small lengths of galvanized steel wire to act as fingers.
Once all your adjustments have been made, you should have a strong, sturdy armature to support your maquette. There are many methods to building an armature and this is just one, so experimenting and improvising during your projects will help you develop a method that works best for you.
Photos Courtesy of Camille Waller